Free Fire Headshot Sensitivity: Best Settings for 2025
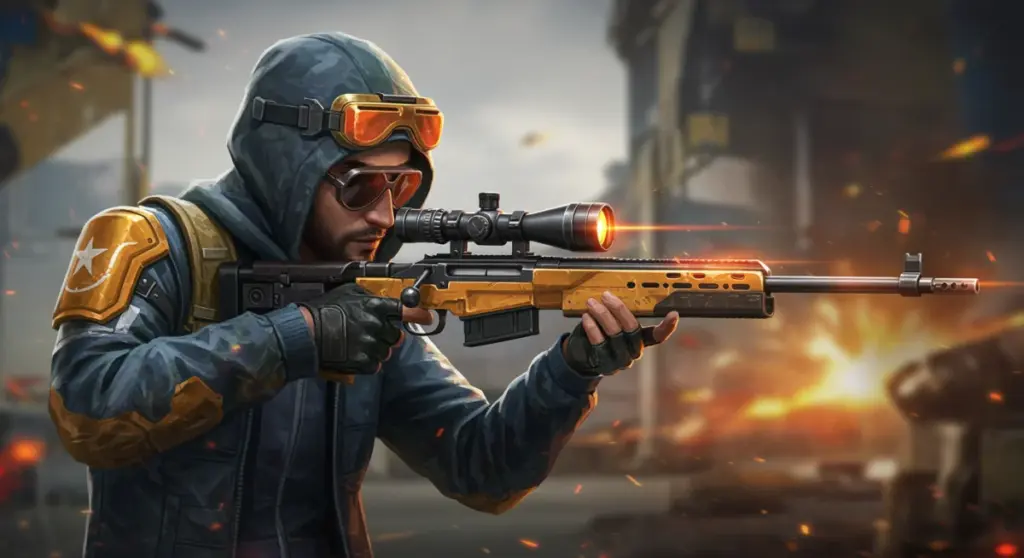
Achieving consistent headshots in Free Fire by 2025 demands optimized sensitivity settings tailored to individual playstyles and device specifications, alongside advanced aiming techniques for superior combat performance.
Por: Pedro Bongiovani em 21 de outubro de 2025
Anúncios
Achieving consistent headshots in Free Fire by 2025 demands optimized sensitivity settings tailored to individual playstyles and device specifications, alongside advanced aiming techniques for superior combat performance.
Are you ready to elevate your Free Fire gameplay and consistently land those satisfying headshots? In the fast-paced world of mobile battle royales, mastering your aim is paramount, and understanding the nuances of Free Fire Headshot Sensitivity is your ultimate key to victory in 2025.
Understanding Free Fire Sensitivity: The Core of Precision
In Free Fire, sensitivity settings dictate how quickly your crosshair moves across the screen in response to your finger movements. This might seem like a minor detail, but it’s the fundamental element that separates a casual player from a headshot maestro. A finely tuned sensitivity allows for swift target acquisition, precise adjustments, and the lightning-fast reflexes needed to outmaneuver opponents in close-quarters combat or snipe them from a distance.
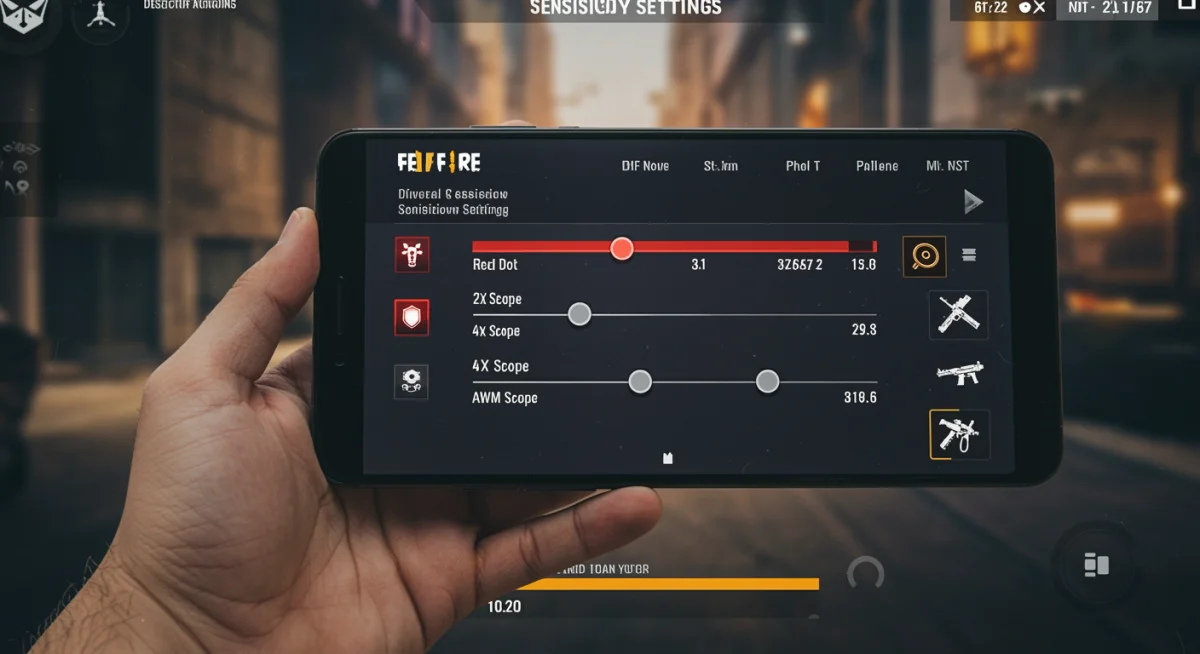
The game offers several sensitivity categories, each impacting different aspects of your aiming. General sensitivity controls overall camera movement and how quickly you can look around. Then there are specific sensitivities for various scopes: Red Dot, 2x Scope, 4x Scope, and AWM Scope. Each of these needs careful calibration, as a setting that works perfectly for a quick Red Dot engagement might be disastrous for a long-range AWM shot. The goal is to find a balance where your aim feels natural and responsive, allowing you to track targets smoothly without overshooting or undershooting.
It’s crucial to understand that there isn’t a one-size-fits-all ‘best’ sensitivity. What works for a professional player on a high-end device might not be ideal for you on a different phone with varying screen size or finger dexterity. Therefore, the journey to finding your optimal settings is a personal one, requiring experimentation and patience. This foundational understanding is the first step towards unlocking your full headshot potential and climbing the ranks in Free Fire.
The Ideal General Sensitivity for Headshots
The General Sensitivity setting in Free Fire is arguably the most critical, as it governs your overall camera movement when not aiming down sights. This impacts how quickly you can turn around, react to flanking enemies, and make broad adjustments to your aim before zeroing in. For headshots, a higher general sensitivity is often preferred, allowing for rapid target acquisition, especially in close-range skirmishes where quick flicks are essential to land those crucial headshots before your opponent can react.
However, going too high can lead to overshooting and a lack of control, making precise micro-adjustments difficult. Conversely, a low general sensitivity will make you slow to react, leaving you vulnerable to fast-moving targets. The sweet spot usually lies in a range that allows for a full 180-degree turn with a single swipe across a comfortable portion of your screen, without feeling erratic. Many pro players and top-tier content creators often recommend a general sensitivity between 90-100. This range typically provides the necessary speed for quick turns while still offering enough control for initial aiming.
Finding Your General Sensitivity Sweet Spot
Start High: Begin with a general sensitivity around 95-100.
Practice Turns: Enter the training ground and practice quick 180-degree turns to engage targets behind you.
Adjust Downwards: If you find yourself consistently overshooting targets, incrementally lower the sensitivity by 2-3 points until movement feels fluid and controlled.
Remember, the goal is fluidity and control. Your general sensitivity should feel like an extension of your natural movements, allowing you to seamlessly transition from scanning the environment to engaging an enemy. Consistent practice and minor adjustments are key to perfecting this foundational setting, ultimately contributing significantly to your headshot accuracy.
Optimizing Scoped Sensitivities: Red Dot, 2x, and 4x
Beyond general sensitivity, the settings for Red Dot, 2x Scope, and 4x Scope are vital for maintaining accuracy when aiming down sights. These sensitivities control the speed of your crosshair when using specific attachments, directly influencing your ability to track moving targets and land precise headshots at varying distances. Each scope requires a distinct approach due to its magnification level and intended use.
For the Red Dot sight, which offers minimal magnification and is ideal for close to medium-range engagements, a relatively high sensitivity (similar to or slightly lower than general) is often effective. This allows for quick target tracking and flick shots when enemies appear suddenly. The 2x Scope, offering moderate magnification, demands a slightly lower sensitivity to ensure stability while tracking. You need enough speed to follow targets but also sufficient control to prevent your crosshair from jumping past the enemy’s head.
The 4x Scope, designed for medium to long-range combat, requires the most precise control. Here, a lower sensitivity is paramount to minimize shaky aim and allow for minute adjustments to hit those distant headshots. Too high, and your aim will be erratic; too low, and you won’t be able to keep up with strafing opponents. The balance is delicate, and finding it will significantly improve your long-range effectiveness.
Recommended Ranges for Scoped Sensitivities
Red Dot: 85-95 (for quick tracking in close-mid range).
2x Scope: 75-85 (for balanced tracking and stability).
These ranges are starting points. Experiment in the training ground by engaging targets at different distances with each scope. Pay close attention to whether you’re overshooting or undershooting and adjust accordingly. The aim is to achieve a smooth, controlled glide of your crosshair over the target’s head, enabling you to consistently land critical hits. Dedicating time to fine-tune these settings will yield significant improvements in your overall headshot accuracy.
AWM Scope Sensitivity: Mastering the Sniper Shot
The AWM, Free Fire’s most iconic sniper rifle, demands a unique sensitivity approach due to its extreme magnification and the precision required for one-shot eliminations. Unlike other scopes, AWM sensitivity is often set significantly lower to ensure maximum stability and control. A slight twitch of the finger can mean the difference between a headshot and a complete miss, especially when engaging targets at very long distances.
A lower AWM sensitivity allows for fine, deliberate movements, crucial for lining up those pixel-perfect headshots. It minimizes the impact of minor hand tremors and enables you to make subtle adjustments without jerking your crosshair off target. While quick-scoping might seem tempting, consistent headshots with the AWM often rely on patience and precise aim. Therefore, sacrificing some speed for unparalleled control is a common strategy among top snipers.
Many professional players opt for AWM sensitivities in the range of 30-50. This range provides the necessary stability for long-range engagements while still allowing for reasonable adjustments. The key is to find a setting where you can slowly and steadily move your crosshair across a distant enemy’s head, stopping precisely when it aligns. Practice in the training ground focusing on static and slow-moving targets to build muscle memory for these delicate movements.
Tips for AWM Sensitivity Refinement
Prioritize Stability: Start with a lower sensitivity, around 40, and increase only if you feel too slow.
Practice Hold Breath: Incorporate the ‘hold breath’ mechanic (if available on your device’s HUD) to further stabilize your aim.
Engage Distant Targets: In the training area, practice shooting at the furthest targets to test your precision.
Mastering the AWM sensitivity is a journey of patience and meticulous practice. Each successful sniper headshot is a testament to the hours spent calibrating this critical setting. With the right sensitivity, the AWM becomes a devastating tool in your arsenal, capable of turning the tide of any battle.
Free Look Sensitivity: Situational Awareness and Headshots
While often overlooked, Free Look sensitivity plays a subtle yet significant role in your overall gameplay and, indirectly, in securing headshots. This setting controls the camera movement when you use the ‘eye’ icon to look around without changing your character’s direction. It’s primarily used for situational awareness, checking flanks, spotting enemies, or observing your surroundings while running or looting.
A balanced Free Look sensitivity allows you to quickly scan your environment for threats or opportunities without disrupting your movement. If it’s too low, you’ll be slow to react to enemies appearing from unexpected angles. If it’s too high, your view might jump erratically, making it difficult to process information. While not directly involved in aiming, quickly spotting an enemy with Free Look can give you the crucial milliseconds needed to turn, aim, and land that initial headshot.
Most players find a Free Look sensitivity in the 60-80 range to be effective. This allows for a swift yet controlled sweep of your surroundings, ensuring you don’t miss important visual cues. Consider it an enhancement to your peripheral vision in a game where every piece of information can be a game-changer. Maintaining optimal situational awareness through Free Look can often lead to preemptive strikes and easier headshot opportunities.
Integrating Free Look into Your Strategy
Constant Scanning: Make it a habit to constantly use Free Look while moving to gather information.
Quick Reactions: If you spot an enemy, immediately transition to aiming mode to capitalize on the information.
Balance with General: Ensure your Free Look sensitivity doesn’t feel jarringly different from your general sensitivity to maintain fluidity.
By effectively utilizing Free Look, you can gain a tactical advantage, spot enemies before they spot you, and set yourself up for more successful engagements and, ultimately, more headshots. It’s a testament to how every setting, no matter how minor it seems, contributes to a holistic and winning Free Fire strategy.
Advanced Tips for Headshot Consistency in 2025
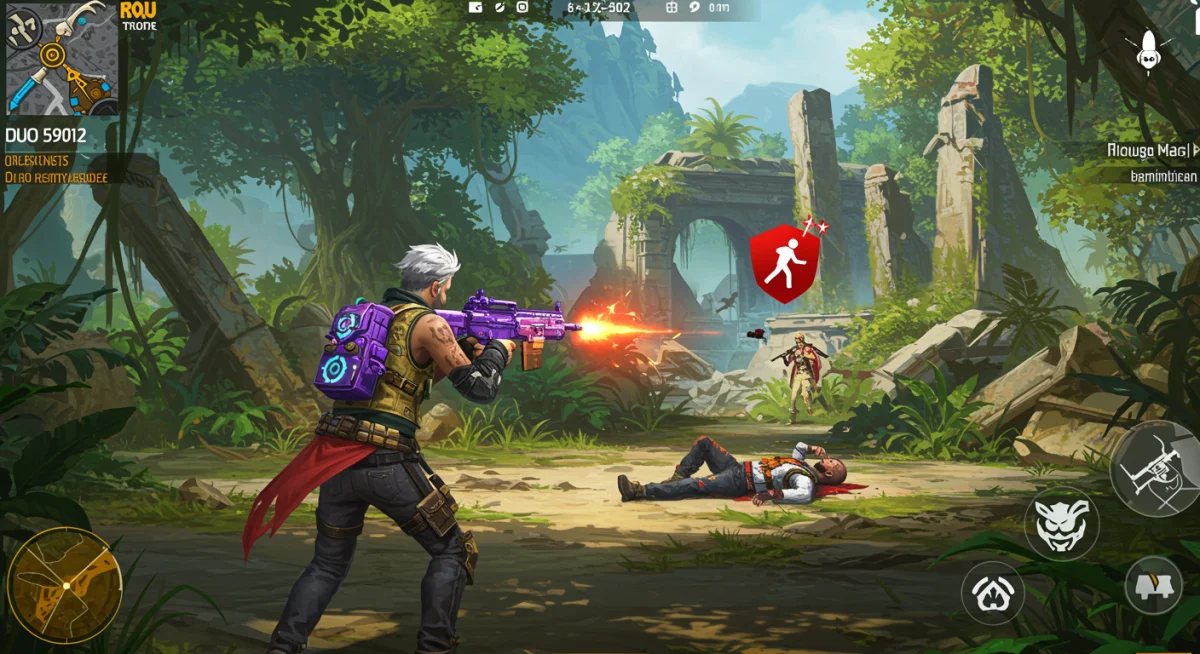
Finding the perfect sensitivity is just the beginning. To truly master headshots in Free Fire by 2025, you need to combine optimal settings with advanced techniques and consistent practice. The game evolves, and so should your approach to aiming. Beyond raw sensitivity, factors like drag-shot mechanics, crosshair placement, and understanding weapon recoil play a pivotal role in hitting those critical shots.
One of the most effective techniques is the ‘drag shot,’ where you drag your finger upwards after firing to pull the crosshair to the enemy’s head. This requires a precise balance of sensitivity and execution. If your sensitivity is too low, the drag won’t be fast enough; if too high, you’ll overshoot. Practicing this in the training ground with various weapons is essential. Another crucial aspect is pre-aiming or crosshair placement. Always try to keep your crosshair at head level, even when moving. This reduces the distance you need to adjust when an enemy appears, significantly increasing your chances of a quick headshot.
Understanding the recoil patterns of different weapons is also vital. Some weapons have predictable vertical recoil, making drag shots easier, while others have more horizontal spread, requiring different compensation techniques. Spend time with your preferred weapons to learn their unique characteristics. Furthermore, don’t neglect your custom HUD (Heads-Up Display). A well-organized HUD ensures that your fire button, scope button, and other essential controls are easily accessible and don’t interfere with your aiming movements. Regularly reviewing and adjusting your HUD can make a surprising difference in your headshot consistency.
Key Advanced Strategies
Master Drag Shots: Practice the upward drag motion immediately after firing to snap to the head.
Pre-aim at Head Level: Always move with your crosshair positioned where an enemy’s head might appear.
Learn Weapon Recoil: Understand and compensate for the unique recoil patterns of your favorite firearms.
Optimize Custom HUD: Ensure your controls are ergonomically placed for seamless aiming and firing.
By integrating these advanced tips with your perfectly tuned sensitivity, you’ll not only improve your headshot rate but also elevate your overall combat effectiveness. The path to becoming a headshot king in Free Fire is paved with continuous learning and dedicated practice.
Device and Personal Playstyle: Tailoring Your Settings
The quest for the best Free Fire Headshot Sensitivity is deeply intertwined with your specific device and individual playstyle. What works wonders for one player on a large tablet might be completely unusable for another on a compact smartphone. Screen size, refresh rate, and even the responsiveness of your touch screen all contribute to how sensitivity feels and performs. A larger screen might allow for more sweeping movements, potentially necessitating a slightly higher sensitivity, while a smaller screen might benefit from more constrained, precise adjustments.
Your personal playstyle also dictates optimal settings. Are you an aggressive rusher who thrives in close-quarters combat, demanding lightning-fast turns and flick shots? Or are you a patient sniper who prefers long-range engagements, requiring ultra-stable aim? An aggressive player might lean towards higher overall sensitivities to react quickly, while a sniper will prioritize lower scope sensitivities for pinpoint accuracy. There’s no shame in adjusting your settings to complement your strengths and mitigate your weaknesses.
Furthermore, the way you hold your device – whether you play with two thumbs, three fingers (claw grip), or even four fingers – significantly impacts your control. A claw grip, for instance, allows for simultaneous movement, aiming, and firing, potentially enabling higher sensitivities due to increased dexterity. Regularly experimenting with different grips and observing how they interact with your current settings is a crucial part of the optimization process. Don’t be afraid to deviate from popular settings if they don’t feel right for you. Your unique comfort and control are paramount.
Considerations for Device and Playstyle
Screen Size: Adjust sensitivity based on the physical space available for finger movement.
Player Role: Aggressive players may prefer higher general sensitivity; snipers, lower scope sensitivity.
Grip Style: Two-thumb, claw, or four-finger grips all influence optimal settings and control.
Device Performance: A smoother device allows for more precise high-sensitivity play.
Ultimately, the best sensitivity is the one that feels most natural and empowering to you. It’s a continuous process of adaptation and refinement, ensuring your settings evolve with your skill and device. Embrace the journey of personalization to unlock your true headshot potential in Free Fire.
Common Mistakes and How to Avoid Them
While striving for the perfect Free Fire Headshot Sensitivity, many players fall into common traps that hinder their progress. Recognizing and avoiding these pitfalls is just as important as knowing the correct settings. One of the most prevalent mistakes is constantly changing sensitivity settings. Players often tweak their settings after every bad game or a string of missed shots, preventing their muscle memory from developing. Consistency is key; stick to a set of settings for a significant period (at least a few days to a week) to allow your brain and fingers to adapt.
Another common error is blindly copying pro player settings. While it can be a good starting point, as discussed, these settings are optimized for their specific devices, playstyles, and often, their years of practice. What works for them might feel completely alien and ineffective for you. Instead, use their settings as a reference to understand general ranges, but always fine-tune them based on your personal experience and feel. Your unique comfort and control are far more important than replicating someone else’s setup.
Neglecting practice is also a major setback. Even with the best sensitivity, consistent headshots require dedicated time in the training ground. Simply playing ranked matches won’t always provide the focused practice needed for aiming drills. Utilize the training mode to practice drag shots, tracking moving targets, and quick scope adjustments without the pressure of live combat. Finally, ignoring your device’s DPI (Dots Per Inch) settings can also impact sensitivity. While Free Fire’s in-game sensitivity is crucial, your device’s overall pointer speed can also influence the feeling of responsiveness. Ensure your device’s settings complement your in-game setup for a truly optimized experience.
Avoiding Sensitivity Pitfalls
Avoid Constant Changes: Allow muscle memory to build by sticking to settings for a period.
Don’t Blindly Copy Pros: Use pro settings as a guide, but prioritize personal comfort and device compatibility.
Dedicate Practice Time: Regularly use the training ground for focused aiming drills.
Check Device DPI: Ensure your phone’s pointer speed complements your in-game sensitivity.
By being mindful of these common mistakes, you can streamline your journey to mastering headshots in Free Fire. Patience, personalized adjustments, and consistent practice are the pillars of achieving superior aiming precision in 2025.
Key Setting
Recommended Range for Headshots
General Sensitivity
90-100 (for quick turns and initial aim)
Red Dot / 2x Scope
85-95 (Red Dot), 75-85 (2x) for balanced tracking
4x Scope / AWM Scope
65-75 (4x), 30-50 (AWM) for precision at range
Free Look
60-80 (for situational awareness)
Frequently Asked Questions About Free Fire Sensitivity
Why is my aim still bad even with high sensitivity settings in Free Fire?▼
High sensitivity alone doesn’t guarantee good aim. If your settings are too high, you might be overshooting targets, making precise adjustments difficult. It’s crucial to find a balance where you have speed without sacrificing control. Practice and fine-tuning specific scope sensitivities are also key to improving overall accuracy, especially for headshots.
Should I copy a pro player’s sensitivity settings for Free Fire?▼
While pro player settings can offer a starting point, it’s generally not recommended to copy them blindly. Their settings are tailored to their specific device, playstyle, and years of muscle memory. It’s far more effective to use their settings as a reference and then adjust them incrementally based on your own comfort, device, and personal gameplay experience.
How often should I adjust my Free Fire sensitivity settings?▼
Avoid frequent changes to your sensitivity settings. Constant adjustments prevent your muscle memory from developing, which is crucial for consistent aiming and headshots. Stick with a set of settings for at least a few days to a week. Make minor adjustments only if you consistently notice specific issues, such as overshooting or undershooting targets.
Does my device’s screen size or refresh rate affect my Free Fire sensitivity?▼
Yes, absolutely. Larger screens might require slightly higher sensitivities for full sweeps, while smaller screens benefit from more controlled movements. A higher refresh rate can also make the game feel smoother, potentially allowing for more precise high-sensitivity play. Always consider your device’s specifications when fine-tuning your settings.
What is the ‘drag shot’ technique and how does sensitivity affect it?▼
The ‘drag shot’ involves dragging your finger upwards after firing to quickly pull your crosshair to an enemy’s head, maximizing headshot potential. Sensitivity directly impacts its effectiveness: too low, and the drag is slow; too high, and you’ll overshoot. Finding the right general sensitivity is crucial for executing effective drag shots consistently in Free Fire.
Conclusion
Mastering Free Fire Headshot Sensitivity in 2025 is a personalized journey that combines careful calibration, consistent practice, and an understanding of advanced aiming techniques. While there’s no universal ‘best’ setting, the recommended ranges and strategies discussed provide a robust framework for you to build upon. Remember to tailor your settings to your device and playstyle, avoid common pitfalls like constant changes, and dedicate time to focused practice in the training ground. By diligently refining your sensitivity and integrating advanced tips like drag shots and optimal crosshair placement, you’ll significantly boost your headshot consistency, elevate your overall gameplay, and dominate the Free Fire battlefield. Your journey to becoming a headshot expert begins with precision and ends with practice.