Free Fire Zone Prediction: Master Safe Zone for Victory
Mastering Free Fire zone prediction is vital for survival and victory, enabling players to anticipate safe zone shifts, optimize movement, and outmaneuver opponents for a crucial tactical advantage.
Por: Pedro Bongiovani em 21 de outubro de 2025
Anúncios
Mastering Free Fire zone prediction is vital for survival and victory, enabling players to anticipate safe zone shifts, optimize movement, and outmaneuver opponents for a crucial tactical advantage.
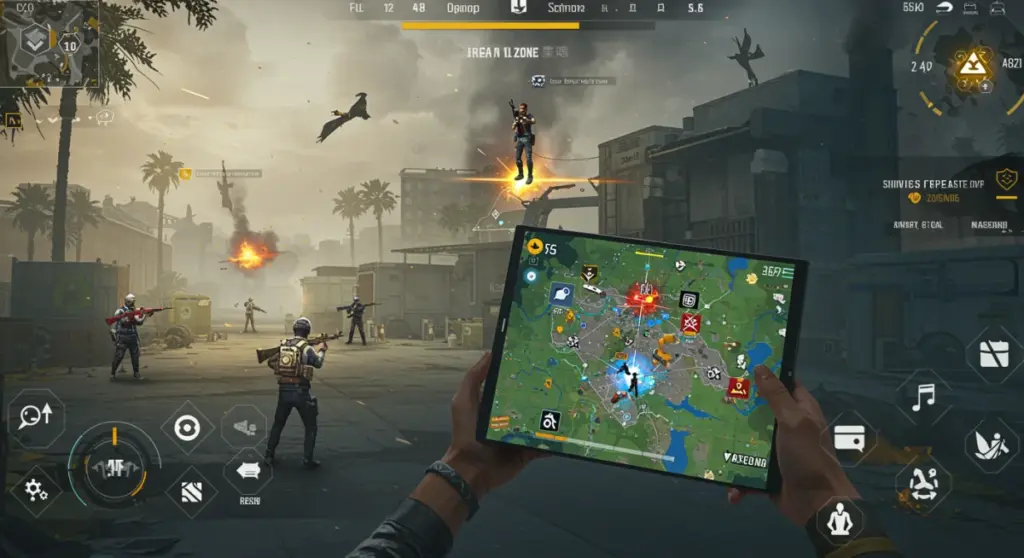
In the high-stakes world of Free Fire, mastering Free Fire Zone Prediction isn’t just a skill; it’s the cornerstone of victory. Understanding how to accurately guess the safe zone’s next move can transform your gameplay, giving you a crucial edge over adversaries. This comprehensive guide will delve into advanced strategies, map analysis, and tactical approaches to help you become a true master of zone anticipation, leading to more Booyahs and a consistently higher rank.
Understanding the Free Fire Zone Mechanic
The shrinking safe zone is Free Fire’s core mechanic, pushing players together and forcing engagements. It’s a dynamic element that dictates the flow of every match, making zone prediction a paramount skill. Ignoring its patterns can lead to premature elimination, while understanding it can pave the way to victory.
The zone, often referred to as the ‘safe zone’ or ‘white circle,’ contracts in stages, dealing damage to anyone caught outside its boundaries. Each stage presents new challenges and opportunities, requiring players to adapt their strategies on the fly. The initial zones are large, allowing for extensive looting, but as the game progresses, the zones become smaller and more lethal.
The Importance of Early Zone Awareness
Early zone awareness is critical for setting the pace of your game. Knowing where the first zone will close helps you decide your initial drop point and looting path. Players who understand this can position themselves advantageously, securing better loot and avoiding early conflicts.
Strategic Landing: Choose drop spots that offer good loot and are relatively central to the first safe zone.
Looting Efficiency: Prioritize essential gear (armor, weapons, healing) to prepare for early skirmishes.
Initial Rotation: Plan your movement towards the center of the first zone, avoiding unnecessary detours.
By focusing on early zone awareness, players can establish a strong foundation for the rest of the match. This proactive approach minimizes risks and maximizes resource gathering, giving you a significant advantage as the game progresses.
The zone mechanic isn’t just about survival; it’s about strategic positioning. Players who consistently find themselves in favorable positions within the safe zone often control the narrative of the match, dictating engagements and minimizing exposure to enemy fire. Mastering this foundational aspect is the first step towards becoming a Free Fire zone prediction expert.
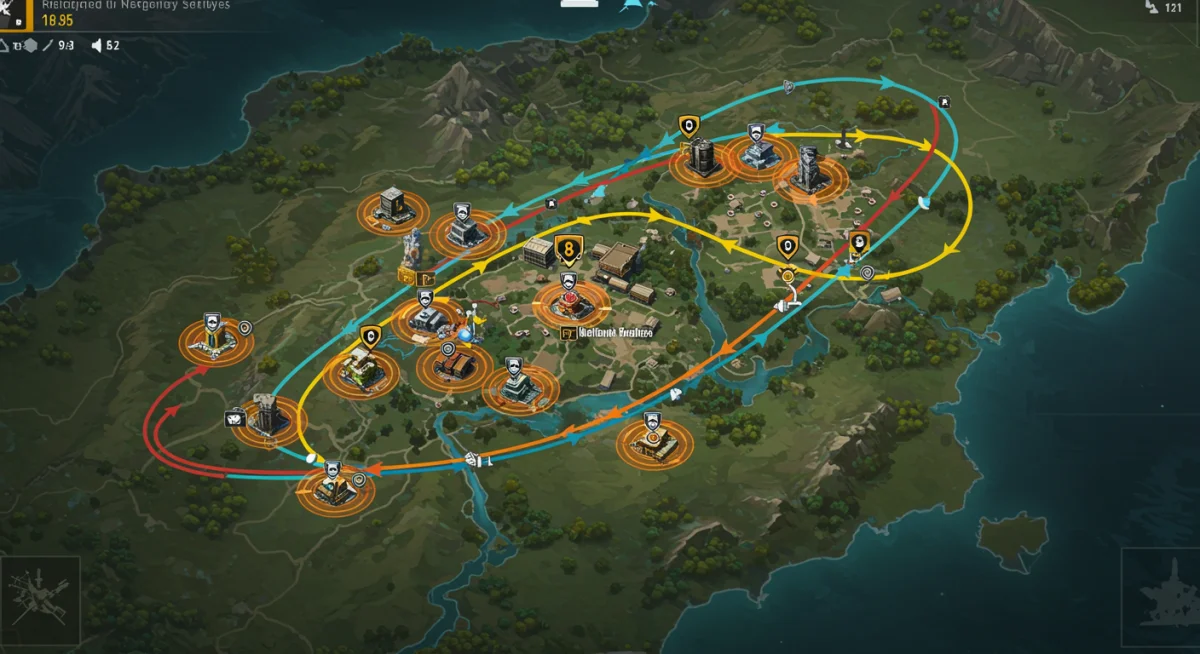
Analyzing Map Topography and High Ground Advantage
Map topography plays a significant role in Free Fire zone prediction. Understanding the layout of each map, including hills, valleys, buildings, and bodies of water, can help you anticipate where the zone might favor and how to best utilize the terrain to your advantage. High ground, in particular, offers unparalleled tactical benefits.
Every map in Free Fire, be it Bermuda, Purgatory, or Kalahari, has unique geographical features that influence gameplay. Identifying these features and their potential impact on zone shifts is crucial for advanced players. For instance, zones that end on open fields will play out very differently from those that conclude in urban areas or mountainous regions.
Leveraging High Ground for Tactical Superiority
High ground provides clear sightlines, making it easier to spot enemies and control engagements. It also offers natural cover, reducing your vulnerability. When predicting zone shifts, look for elevated positions that might be included in future safe zones.
Vision Control: High ground gives you a commanding view of the surrounding area, allowing you to track enemy movements.
Damage Advantage: Shooting downhill is often easier and more accurate, giving you an edge in combat.
Defensive Positioning: Natural cover on high ground provides protection from incoming fire, making it harder for enemies to push you.
Securing high ground early can turn the tide of a match. It allows you to hold strong defensive positions and forces enemies to push uphill, putting them at a disadvantage. Always consider how the terrain interacts with potential zone placements.
Analyzing map topography also involves understanding choke points and natural barriers. These areas can become deadly as the zone shrinks, but they can also be used to funnel enemies into advantageous positions. A thorough understanding of the map’s nuances is indispensable for accurate zone prediction and strategic movement.
Understanding Zone Shrink Patterns and Algorithms
Free Fire’s zone shrinking isn’t entirely random; it follows certain patterns and algorithms. While the exact formula remains proprietary, experienced players can discern tendencies that help them make educated guesses about future safe zones. Recognizing these patterns is key to effective Free Fire Zone Prediction.
The game’s developers design the zone mechanics to create intense, unpredictable, yet understandable engagements. This means that while some randomness is inherent, there are underlying principles that guide the zone’s behavior. Learning to ‘read’ these principles can significantly improve your predictive accuracy.
Common Zone Behavior and Deviations
Zones often tend to favor central locations, but they can also ‘pull’ towards one side of the map, especially in later stages. Observing how the first few zones behave can give you clues about the final destination. Pay attention to how the zone interacts with major landmarks.
Central Tendency: Early zones often center around the initial drop areas, gradually shifting.
Edge Pull: Later zones might pull towards an unexpected edge, forcing players to rotate long distances.
Landmark Influence: Zones sometimes gravitate towards areas with high loot or strategic points like observatories or power plants.
Understanding these general behaviors helps you narrow down potential safe zone locations. However, be prepared for deviations; the zone can sometimes surprise even the most seasoned players. The key is to have a flexible strategy that can adapt to unexpected shifts.
The algorithm also considers player distribution, though this is less predictable. The zone tries to avoid emptying entire sections of the map too quickly, ensuring a more balanced spread of players. By combining an understanding of map topography with observed zone patterns, players can develop a more robust prediction model.
Advanced Strategies for Real-Time Zone Analysis
While theoretical knowledge is crucial, real-time zone analysis is where advanced players truly shine. This involves constantly evaluating the current zone, observing enemy movements, and making rapid decisions about your next rotation. Dynamic Free Fire Zone Prediction requires constant vigilance and adaptability.
The game environment is constantly changing, with enemies moving, shots being fired, and the zone relentlessly shrinking. Successful real-time analysis means processing all this information quickly and using it to inform your tactical decisions. It’s about being one step ahead of the competition.
Observing Enemy Rotations and Engagements
Enemy positions and movements are invaluable indicators of future zone shifts. If multiple teams are pushing towards a particular area, it might suggest they anticipate the zone moving in that direction. Use their actions to validate or adjust your own predictions.
Tracking Enemy Squads: Note where enemies are engaging and which directions they are moving towards.
Sound Cues: Gunshots and vehicle sounds can reveal enemy locations and intended rotation paths.
Looted Areas: Areas with fresh loot indicate recent enemy presence, suggesting potential future zone centers.
By monitoring enemy behavior, you not only gather intelligence on their positions but also gain insights into their zone predictions. If many players are moving to a specific point, there’s a higher chance that point is a strong candidate for the next safe zone. Use this information, but don’t blindly follow; always cross-reference with your own analysis.
Real-time analysis also includes assessing your own resources. Do you have enough healing items to survive a prolonged run through the blue zone? Is your current position defensible? These factors influence the feasibility of your predicted rotation paths. Being able to quickly adapt your plan based on evolving circumstances is a hallmark of an expert zone predictor.
Optimizing Movement and Positioning Within the Zone
Accurate zone prediction is only half the battle; the other half is executing flawless movement and positioning. Knowing where the zone will go is useless if you can’t get there safely and establish a strong defensive posture. This section focuses on translating your predictions into actionable in-game strategies for optimal movement and positioning.
Effective movement isn’t just about speed; it’s about smart routing, using cover, and avoiding unnecessary engagements. Positioning, on the other hand, involves choosing locations that offer both offensive and defensive advantages, allowing you to control the battlefield.
Safe Rotations and Flanking Opportunities
When rotating into a new zone, prioritize paths that offer maximum cover and minimal exposure to enemy fire. Avoid open areas unless absolutely necessary. Look for opportunities to flank unsuspecting enemies who are also rotating.
Utilize Cover: Move from tree to rock, building to building, minimizing time spent in the open.
Blue Zone Edge: Sometimes, rotating along the very edge of the blue zone can be safer, as fewer enemies expect you there.
High Ground First: Always aim to secure high ground within the new safe zone if possible.
A well-executed rotation can catch enemies off guard, allowing you to secure a better position or even eliminate distracted opponents. Always be aware of your surroundings and listen for footsteps or gunshots that might indicate nearby threats. The goal is to arrive at your desired position undetected and ready to engage.
Effective positioning also means understanding the concept of ‘power positions’ within the zone. These are locations that offer significant advantages, such as strong cover, good sightlines, and control over key routes. Identifying and securing these positions early can give you a decisive advantage in late-game engagements.
Common Mistakes to Avoid in Zone Prediction
Even seasoned players can fall victim to common pitfalls when it comes to zone prediction. Recognizing and actively avoiding these mistakes is as crucial as learning the correct strategies. Improving your Free Fire Zone Prediction involves not just knowing what to do, but also what not to do.
Many players make assumptions that cost them the game. Overconfidence, tunnel vision, or simply neglecting to adapt can lead to disastrous outcomes. By understanding these common errors, you can develop a more robust and resilient approach to zone management.
Ignoring the Blue Zone Damage
One of the most frequent mistakes is underestimating the blue zone’s damage. While it’s manageable in early stages, late-game blue zone damage can quickly deplete your health, even with medkits. Don’t linger too long outside the safe zone.
Health Management: Always carry enough healing items to survive a short run through the blue zone.
Time Awareness: Keep an eye on the zone timer and plan your rotations accordingly, allowing ample time.
Risk Assessment: Evaluate whether staying outside the zone for loot or a kill is worth the health cost.
Engaging enemies while simultaneously taking blue zone damage is a recipe for disaster. Prioritize getting into the safe zone, then engage. Your health is your most valuable resource, especially in the late game.
Another common mistake is becoming too fixated on one predicted zone location. The zone is dynamic, and while patterns exist, it’s not entirely predictable. Always have a backup plan and be ready to adjust your strategy if the zone pulls in an unexpected direction. Flexibility is key to survival and victory in Free Fire.
Key Point
Brief Description
Early Zone Awareness
Prioritize strategic drops and efficient looting based on the first safe zone’s location.
Map Topography
Utilize high ground and natural cover for tactical advantages during zone shifts.
Zone Shrink Patterns
Understand common zone behaviors and be prepared for unexpected deviations.
Real-Time Analysis
Observe enemy movements and adapt your zone prediction and rotation plans dynamically.
Frequently Asked Questions About Free Fire Zone Prediction
How accurate is Free Fire Zone Prediction?▼
While no prediction is 100% accurate due to inherent randomness, understanding map layouts, common zone patterns, and real-time enemy movements significantly increases your chances. Experienced players can achieve a high degree of accuracy by combining these factors, allowing for strategic positioning and movement.
Does the initial drop point influence zone prediction?▼
Yes, the initial drop point can influence your early zone prediction. Landing centrally often gives you more options for subsequent zones. However, as the game progresses, the zone’s pull becomes more independent of initial player distribution, requiring constant reassessment.
Are there specific map areas favored by the safe zone?▼
Certain areas, especially those with good cover, high ground, or central positions, tend to be favored by the zone algorithm. However, the zone can also pull towards less obvious locations to create dynamic engagements. Learning these tendencies for each map is crucial.
How can I practice zone prediction effectively?▼
Practice by consistently observing the zone’s behavior in every match. Pay attention to how it shrinks relative to landmarks and enemy positions. Reviewing gameplay footage can also help identify patterns you might have missed in the heat of the moment, refining your predictive skills.
What’s the biggest mistake in Free Fire zone strategy?▼
The biggest mistake is often tunnel vision – focusing too much on looting or engaging enemies without considering the shrinking zone. This leads to being caught outside the safe zone, taking unnecessary damage, or being forced into disadvantageous rotations. Always prioritize zone movement.
Conclusion
Mastering Free Fire Zone Prediction is a continuous journey that combines map knowledge, tactical observation, and adaptable decision-making. By understanding the underlying mechanics of the safe zone, leveraging map topography, analyzing shrink patterns, and performing real-time assessments, players can significantly elevate their gameplay. Avoiding common mistakes and consistently practicing these strategies will not only lead to more consistent top finishes but also grant you that crucial edge needed to secure victory after victory. Embrace the zone, anticipate its moves, and conquer the battlefield.