Roblox Scripting for Beginners: Create Your First Game in 7 Days
This comprehensive guide empowers beginners to master Roblox scripting and develop their first game within a week, offering step-by-step instructions and practical advice for aspiring creators.
Por: Pedro Bongiovani em 21 de outubro de 2025
Anúncios
Aspiring game developers can learn Roblox scripting for beginners and create their first interactive experience within seven days by following a structured daily learning plan.
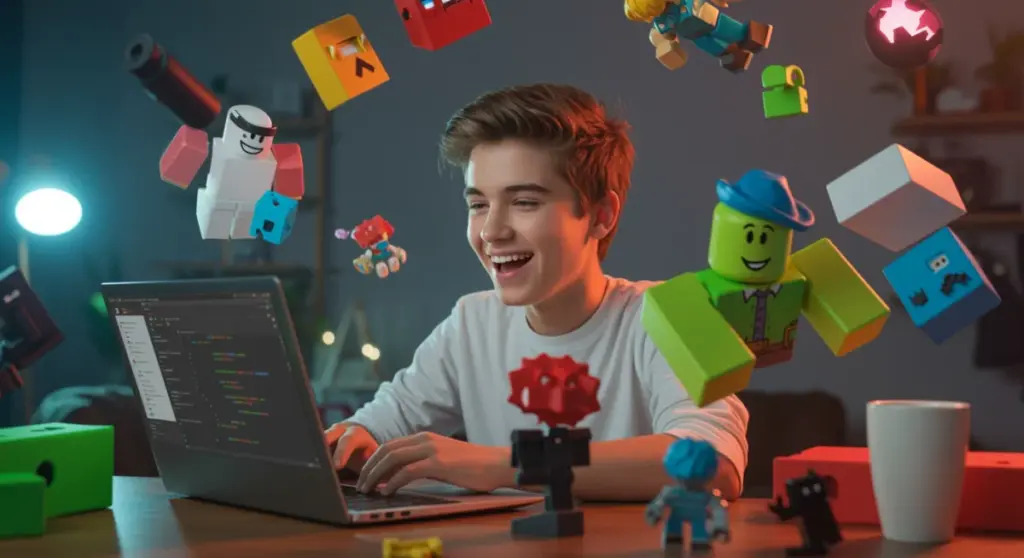
Have you ever dreamed of creating your own virtual world, a place where your imagination runs wild and others can join in the fun? The exciting journey of Roblox scripting for beginners is more accessible than you might think, offering a powerful platform to turn those dreams into reality. This guide is designed to launch you into game development, showing you how to build your very first Roblox game in just seven days.
Day 1: Understanding Roblox Studio and Lua Basics
Your journey into creating games on Roblox begins with familiarizing yourself with Roblox Studio, the primary development environment. It’s where all the magic happens, from building terrain to writing complex scripts. Understanding its layout and core functionalities is crucial before diving into coding.
Alongside Studio, you’ll start your introduction to Lua, the programming language that powers Roblox games. Lua is known for its simplicity and efficiency, making it an excellent choice for beginners. Don’t be intimidated; we’ll break down the fundamental concepts into manageable steps.
Navigating Roblox Studio’s Interface
Roblox Studio presents a user-friendly interface, but it has many powerful tools. Take some time to explore the main panels you’ll be using constantly.
Explorer Window: This panel lists all the objects in your game, from parts and models to scripts and players. It’s your game’s hierarchical blueprint.
Properties Window: When you select an object in the Explorer or in the 3D viewport, its properties (like color, size, position, and transparency) appear here, allowing you to customize them.
Toolbox: A vast library of assets created by Roblox and other users, including models, decals, audio, and plugins. It’s a great resource for getting started quickly.
Output Window: This is where Studio displays messages, errors, and print statements from your scripts, essential for debugging.
Becoming comfortable with these windows will significantly speed up your development process. Practice selecting objects, changing their properties, and observing how these changes reflect in the game world.
Introduction to Lua Syntax
Lua is a lightweight, multi-paradigm programming language designed primarily for embedded use in applications. In Roblox, it’s used to control game logic, player interactions, and object behaviors. Here are some basic concepts you’ll encounter:
Variables: Used to store data. For example, local speed = 16 creates a variable named ‘speed’ with a value of 16.
Data Types: Lua supports various data types like numbers, strings (text), booleans (true/false), and tables (collections of data).
Comments: Lines of code ignored by the program, used to explain your code. In Lua, they start with --.
Print Statements: The print() function is invaluable for debugging, displaying messages in the Output window.
The goal for Day 1 is not to become a Lua expert, but to understand its basic structure and how it interacts with Roblox Studio. By the end of today, you should feel confident navigating the Studio interface and writing simple Lua commands.
Day 2: Building Your Game Environment and Basic Objects
With a grasp of Roblox Studio’s interface and Lua basics, Day 2 focuses on the foundational aspect of game creation: building your environment. This involves creating and manipulating parts, which are the building blocks of any Roblox game. You’ll learn how to shape your world and add simple interactive elements.
This stage is where your creative vision starts to take shape. Don’t worry about complex scripting yet; focus on constructing the physical layout of your game using Studio’s intuitive building tools. Experimentation is key during this phase to understand how different parts interact.
Creating and Manipulating Parts
Parts are the most fundamental objects in Roblox. They can represent anything from a simple platform to a complex structure. Roblox Studio provides various tools to create and modify these parts.
Insert Part: You can add a new part by clicking the ‘Part’ button in the ‘Model’ tab. This will typically insert a default block.
Move, Scale, Rotate: These are the three primary transform tools. ‘Move’ lets you position a part, ‘Scale’ changes its size, and ‘Rotate’ adjusts its orientation in 3D space. Use the handles that appear when you select a tool to manipulate the parts effectively.
Anchoring: A crucial concept. Anchoring a part makes it immobile, preventing it from falling or being pushed. Most static objects in your game (like floors, walls, and decorative elements) should be anchored.
Color and Material: Customize the appearance of your parts using the ‘Properties’ window. Change colors, and apply different materials like plastic, wood, metal, or even neon to achieve various visual effects.
Practice building simple structures like houses, bridges, or obstacle courses. Think about how players will navigate your world and what elements will make it engaging. Remember to anchor parts that shouldn’t move.
Grouping and Organizing Your Workspace
As your game world grows, keeping your workspace organized becomes essential. Grouping parts and using folders in the Explorer window helps maintain a clean and manageable project.
When you select multiple parts, you can group them together using the ‘Group’ button in the ‘Model’ tab. This creates a ‘Model’ object in the Explorer, making it easier to move, scale, or rotate multiple parts as a single unit. You can also create ‘Folders’ to categorize different sections of your game, like ‘Environment,’ ‘Interactables,’ or ‘Scripts.’
A well-organized workspace not only makes your game easier to manage but also helps you debug and find specific objects quickly. This practice is vital for any game development project, regardless of its scale. By the end of Day 2, you should have a basic game environment constructed, ready for scripting.
Day 3: Introduction to Scripting and Events
Today marks your official dive into scripting within Roblox Studio. This is where you bring your static game environment to life, making objects react to players, change over time, and create dynamic experiences. We’ll focus on understanding how scripts work, where to place them, and how to use events to trigger actions.
Scripting is the heart of any interactive game. It allows you to define rules, create challenges, and provide feedback to players. Don’t be afraid to make mistakes; they are an integral part of the learning process in programming.
Adding Your First Script
Scripts in Roblox are Lua files that contain instructions for the game engine. They are typically placed inside the objects they are meant to control, or in special service containers like ServerScriptService for server-wide logic.
Creating a Script: Select a part in your workspace, then in the Explorer window, click the ‘+’ icon next to it and choose ‘Script’. This will create a new script named ‘Script’ inside that part and open the script editor.
Hello World: The traditional first program. Type print("Hello, Roblox!") into your new script. Run the game (F5 or ‘Play’ button) and observe the Output window. You should see your message printed, confirming your script executed.
Local Scripts vs. Server Scripts: Understanding the difference is vital. Server scripts (just ‘Script’) run on the server and affect all players. Local scripts (placed inside StarterPlayer > StarterPlayerScripts or player-specific UI elements) run on the player’s client and only affect that specific player’s view.
For now, we’ll primarily use server scripts attached to parts or in ServerScriptService to affect the entire game world. Practice creating several scripts and making them print different messages to solidify your understanding.
Understanding Events and Connections
Events are actions that occur in the game, such as a player touching a part, a button being clicked, or a certain amount of time passing. Scripts listen for these events and execute specific code in response. This is how you create interactivity.
A common event is Touched. Let’s make a part change color when a player touches it:
local part = script.Parent

function onPartTouched(otherPart)
    local humanoid = otherPart.Parent:FindFirstChild("Humanoid")
    if humanoid then
        part.BrickColor = BrickColor.random()
    end
end

part.Touched:Connect(onPartTouched)
In this example, part.Touched is the event, and :Connect(onPartTouched) establishes a connection, meaning whenever the ‘Touched’ event fires, the onPartTouched function will execute. The otherPart argument represents the object that touched our part. By the end of Day 3, you should be able to write simple scripts that react to player interactions.
Day 4: Creating Interactive Elements and Game Logic
Building on your scripting fundamentals, Day 4 is all about developing interactive elements and establishing basic game logic. This is where you start to define how players will interact with your game world and what actions will trigger specific outcomes. We’ll explore more complex event handling and introduce conditional statements.
Think about the core mechanics of your game. Will players collect items? Solve puzzles? Navigate obstacles? Each of these interactions relies on well-structured game logic implemented through scripting.
Implementing Player Interaction
Beyond simple touch events, you can create more sophisticated interactions. Consider a button that opens a door or a collectible item that gives the player points. These often involve checking specific conditions before an action occurs.
ClickDetectors: Attach a ClickDetector object to a part (click ‘+’ next to the part in Explorer). This allows players to click on the part. Its MouseClick event can be connected to a function to trigger actions.
Item Collection: When a player touches an item, you might want to remove the item and update a score. This involves destroying the part (part:Destroy()) and potentially communicating with other scripts to update player data.
Teleporters: Create two parts, and when a player touches one, teleport them to the other using their Position property. For example: player.Character.HumanoidRootPart.CFrame = CFrame.new(destinationPart.Position).
Experiment with these interactive elements. Create a simple button that changes the color of another part, or a collectible that disappears when touched. These small successes build confidence and understanding.
Conditional Logic: If-Then Statements
Conditional statements are fundamental to game logic. They allow your script to make decisions based on whether certain conditions are true or false. The most common is the if-then-else structure.
local part = script.Parent
local canTouch = true

part.Touched:Connect(function(otherPart)
    local player = game.Players:GetPlayerFromCharacter(otherPart.Parent)
    if player and canTouch then
        print(player.Name .. " touched the part!")
        canTouch = false -- Prevent immediate re-touching
        task.wait(2)
        canTouch = true
    end
end)
In this script, the action (printing a message) only occurs if player and canTouch are true. The task.wait() function pauses the script for a specified number of seconds, useful for cooldowns or delays. By the end of Day 4, you should be able to create objects that respond to player input and implement simple decision-making in your scripts, forming the backbone of your game’s interactivity.
Day 5: User Interface (UI) and Player Feedback
A compelling game isn’t just about its world and mechanics; it’s also about how players interact with it through the user interface (UI) and the feedback they receive. Day 5 focuses on creating UI elements and using them to enhance the player experience, displaying information like scores, health, or instructions.
Effective UI design is about clarity and responsiveness. Players should intuitively understand what’s happening and how to control the game. Good feedback, whether visual or textual, guides players and makes the game more engaging.
Designing Basic UI Elements
Roblox Studio provides a powerful suite of UI tools under StarterGui. Objects placed here will appear on the player’s screen. You’ll typically use ScreenGui as a container for other UI elements.
ScreenGui: Insert a ScreenGui into StarterGui. This is the canvas for your UI.
TextLabel: Displays static text. Use it for titles, instructions, or fixed information. You can customize its font, size, color, and background in the Properties window.
TextButton: A clickable button. Attach a LocalScript inside it and use its MouseButton1Click event to trigger actions.
ImageLabel/ImageButton: Similar to TextLabel/TextButton but display images.
Frame: A container for grouping other UI elements, useful for creating panels or sections.
Positioning UI elements effectively is key. Use properties like Position and Size, often with Scale values (e.g., {0.5, 0}, {0.1, 0} for 50% width and 10% height, centered) to ensure your UI scales correctly on different screen sizes. Practice creating a simple score display or a start button.
Displaying Dynamic Information
UI becomes truly powerful when it displays dynamic information, such as a player’s score or remaining time. This requires a LocalScript to update the UI element’s properties.
-- LocalScript inside a TextLabel
local textLabel = script.Parent

local player = game.Players.LocalPlayer
local leaderstats = player:WaitForChild("leaderstats")
local score = leaderstats:WaitForChild("Score")

score.Changed:Connect(function()
    textLabel.Text = "Score: " .. score.Value
end)

-- Initial display
textLabel.Text = "Score: " .. score.Value
This LocalScript assumes you have a ‘Score’ value inside a ‘leaderstats’ folder for the player (a common Roblox pattern for player data). It listens for changes to the ‘Score’ value and updates the TextLabel accordingly. Remember that UI updates for a specific player should generally be handled by LocalScripts. By the end of Day 5, you should have a functional UI that provides important feedback to the player, making your game more comprehensible and enjoyable.
Day 6: Testing, Debugging, and Refinement
You’ve built your world, added interactivity, and designed a UI. Day 6 is critical for ensuring everything works as intended. This phase involves extensive testing, identifying and fixing bugs (debugging), and refining your game’s mechanics and aesthetics. A well-tested game provides a much better player experience.
Debugging is a skill every developer must cultivate. It’s about systematically finding and resolving issues in your code and game design. Refinement, on the other hand, is about polishing your game to make it more enjoyable and visually appealing.
Effective Testing Strategies
Don’t just play your game once. Test it repeatedly, trying different scenarios and player actions. Think like your players, even trying to break your game deliberately.
Play Solo: Use the ‘Play’ button in Studio to test your game as a single player.
Play Here/Run: ‘Play Here’ spawns your character at your current camera location, useful for testing specific areas. ‘Run’ starts the game without spawning a character, letting you observe scripts and physics.
Test Server: For multiplayer games, use the ‘Test’ tab and select ‘Start Server’ with multiple players. This simulates a live environment and helps identify synchronization issues.
Edge Cases: Test what happens when players do unexpected things. Can they get stuck? Can they bypass challenges?
Keep a list of bugs or issues you encounter and tackle them one by one. Consistent testing throughout development saves a lot of headaches later on.
Debugging Your Scripts
When something goes wrong, debugging is your superpower. Roblox Studio offers several tools to help you pinpoint problems.
Output Window: Your best friend. It shows errors, warnings, and messages from your print() statements. Read error messages carefully; they often tell you exactly which script and line number has an issue.
Breakpoints: In the script editor, click to the left of a line number to set a breakpoint. When the script runs and hits that line, execution pauses, allowing you to inspect variable values and the program state.
Watch Window: While debugging with breakpoints, the ‘Watch’ window (under ‘View’ in Studio) lets you monitor the values of specific variables as your script executes.
Don’t be afraid to add extra print() statements to track variable values or confirm code execution paths. This systematic approach will help you quickly identify and resolve issues. By the end of Day 6, your game should be largely bug-free and feel polished, ready for its public debut.
Day 7: Publishing Your Game and Beyond
Congratulations! You’ve spent six days building, scripting, and refining your first Roblox game. Day 7 is about sharing your creation with the world. Publishing your game makes it accessible to millions of players on the Roblox platform. We’ll also touch upon what comes next in your game development journey.
Publishing is a significant milestone, but it’s also the beginning of a new phase. Gathering player feedback and continuously updating your game are crucial for long-term success and engagement. Your learning journey doesn’t end here; it merely evolves.
Publishing Your Game to Roblox
Publishing your game is a straightforward process in Roblox Studio.
Save to Roblox: Go to ‘File’ > ‘Save to Roblox As…’. If it’s your first time, you’ll create a new game. Give it a descriptive name and a compelling description.
Game Settings: Before publishing, go to ‘Game Settings’ (under the ‘Home’ tab). Here, you can configure various aspects, including permissions (who can play), monetization options (if you plan to sell game passes or developer products), and security settings.
Permissions: Ensure your game is set to ‘Public’ if you want others to play it. Otherwise, it will remain private.
Go Live: Once saved and configured, your game is live! Players can now find and play it on the Roblox website.
Remember to regularly save your progress to Roblox and keep your game settings updated. A well-configured game attracts more players and provides a better experience.
Gathering Feedback and Iteration
Once your game is published, the real learning begins. Pay attention to player feedback. This can come from comments on your game page, messages, or even analytics provided by Roblox.
Player Analytics: Roblox provides dashboards with data on how players interact with your game (e.g., average play time, retention rates). Use this data to understand what’s working and what isn’t.
Community Feedback: Engage with players. What do they like? What do they find frustrating? What features would they like to see?
Iteration: Game development is an iterative process. Use feedback to plan updates, fix issues, and add new content. Don’t be afraid to make changes; it shows you’re committed to improving the player experience.
The journey of a game developer is continuous. Each new game, each update, and each piece of feedback provides an opportunity to learn and grow. By the end of Day 7, you’ll not only have published your first Roblox game but also gained valuable insights into the ongoing process of game development. Keep creating, keep learning, and most importantly, keep having fun!
Key Aspect
Brief Description
Roblox Studio & Lua
Master the development environment and learn basic Lua scripting for game logic.
Building & Interaction
Construct game environments with parts and add interactive elements using events.
UI & Feedback
Design user interfaces to display information and enhance player experience.
Testing & Publishing
Thoroughly test, debug, and publish your game to the Roblox platform for others to enjoy.
Frequently Asked Questions About Roblox Scripting
Is Roblox scripting hard for absolute beginners?▼
Roblox scripting uses Lua, which is considered a beginner-friendly programming language. While it has a learning curve like any new skill, Roblox Studio provides many tools and resources that make it accessible. Our 7-day guide breaks down the process into manageable daily steps, making it easier to grasp the concepts and build confidence as you go.
What is the main programming language used in Roblox?▼
The primary programming language used for scripting in Roblox is Lua. Lua is known for its simplicity, speed, and efficiency, making it an excellent choice for game development. Roblox Studio integrates Lua seamlessly, allowing developers to create complex game logic, interactive elements, and dynamic environments with relative ease.
Do I need to download anything to start Roblox scripting?▼
Yes, to start Roblox scripting and game development, you need to download and install Roblox Studio. It’s a free, standalone application available on the official Roblox website. Roblox Studio provides all the tools, editors, and environments necessary to build, script, and publish your games directly to the Roblox platform.
How long does it take to learn Roblox scripting?▼
The time it takes to learn Roblox scripting varies greatly depending on individual learning pace and prior programming experience. Our guide aims to help beginners create their first functional game in 7 days by focusing on core concepts. However, mastering scripting and advanced game development is an ongoing process that can take months or even years of continuous practice and learning.
Can I make money from my Roblox game creations?▼
Yes, many Roblox developers earn money from their games. Roblox offers various monetization options, including selling game passes, developer products (one-time purchases), and premium payouts (based on player engagement). Successful games with high player counts and engaging content can generate significant Robux, which can then be converted into real-world currency through the Developer Exchange program.
Conclusion
Embarking on the journey of Roblox scripting for beginners is an incredibly rewarding experience, opening up a world of creative possibilities. In just seven days, you’ve moved from understanding the basics of Roblox Studio and Lua to building interactive environments, designing user interfaces, and ultimately publishing your very own game. This structured approach not only demystifies game development but also provides a solid foundation for future projects. Remember that this is just the beginning; the Roblox platform is vast, and continuous learning, experimentation, and engaging with the community will further enhance your skills. Keep building, keep innovating, and enjoy the process of bringing your unique visions to life for millions of players worldwide.